
How to use OpenAI in Laravel
Nuno Maduro and I developed a PHP library to work with the REST API of OpenAI.
It has fully typed responses and is optimized to be used with frameworks like Laravel.
In this blog post I will show how to use this package in Laravel based on a simple example you can find here: GitHub Bio Generator
All the source is available at GitHub.
Install the OpenAI PHP Client
First of all we have to install the package via composer:
composer require openai-php/client
Please keep in mind that the package requires PHP 8.1 and has no stable release yet and is probably changed in the near future.
Register the client as a singleton
To have the OpenAI Client available everywhere in our application we are going to register it as a singleton in our AppServiceProvider.
public function register()
{
    $this->app->singleton(Client::class, function ($app) {
        return OpenAI::client(config('app.openai.api-token'));
    });
}
🎉 That's it! The client is ready to use.
Create the GUI
Before we can actually use the client we have to set up a litte demo application. In this example we only need a single input to capture the keywords the AI should include into the GitHub bio and a place where we can show the result.
As I like to work with Laravel Livewire I am going to use it. If you are not familiar with Livewire, don't worry, you will be able to follow along.
First we create a Livewire component which has two public properties to store the keywords provided by the user and the resulting bio.
<?php

namespace App\Http\Livewire\Pages\Playground\OpenAI;

use Livewire\Component;

class GithubBioGenerator extends Component
{
    public $bio = '';
    public $keywords = '';

    public function render()
    {
        return view('livewire.pages.playground.openai.github-bio-generator')
            ->layout('components.layout.main', [
                'title' => 'GitHub Bio Generator',
            ]);
    }
}
Then we need to create the blade file to actually render the output. For a better readability I've removed all the tailwind classes.
<div>
    <!-- Form to capture the keywords -->
    <form wire:submit.prevent="generate">
        <input wire:model.defer="keywords"
               type="text"
               placeholder="Keywords to include (PHP, Laravel, ...)"
        >
        <button type="submit">Generate</button>
    </form>

    <!-- Place to show the generated output -->
    @if($bio)
        <h2>Your new bio?</h2>
        <div>
            {{ $bio }}
        </div>
    @endif
</div>
Use the AI power
As you can see in the blade file we have created before, we are going to call the generate() method on the Livewire component as soon as the user submits the form: wire:submit.prevent="generate"
Let's add the generate() method to our GithubBioGenerator component:
class GithubBioGenerator extends Component
{
// ...
public function generate()
{
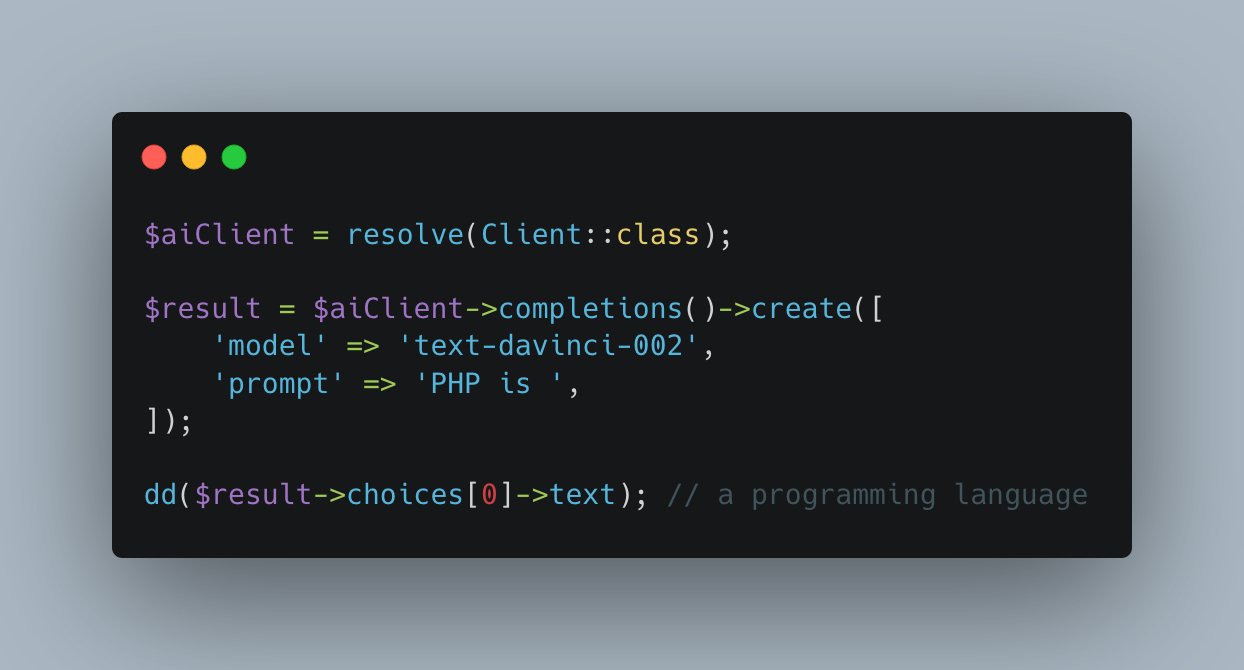
$aiClient = resolve(Client::class);
$result = $aiClient->completions()->create([
'model' => 'text-davinci-002',
'prompt' => 'Write a GitHub bio including the keywords: ' . $this->keywords . ' ',
'max_tokens' => 256,
'temperature' => 1,
]);
$this->bio = $result->choices[0]->text;
}
}
That's everything required to get the magic happen and here are the explanations:
1. Resolve the client from the Laravel service container
$aiClient = resolve(Client::class);
If you want to learn more about the service container and why to use a singleton read the excellent Laravel documentation.
2. Call the OpenAI completions endpoint
$result = $aiClient->completions()->create([
    'model' => 'text-davinci-002',
    'prompt' => 'Write a Github bio including the keywords: ' . $this->keywords . ' ',
    'max_tokens' => 256,
    'temperature' => 1,
]);
First we have to decide which GTP-3 model we want to use. Open AI provides four default models of which davinci is the most advanced but slowest. (And the most expensive if you have to pay for it 🤑)
Then we create a prompt which we pass to the AI to complete. As GTP-3 is an AI trained with natural language it's best in understanding (and completing) natural sentences and not just keywords.
max_tokens instructs the AI how long the output maximal is allowed to be. 256 tokens lead to a maximal length of around 1000 characters. To learn more about the tokens see the documentation.
temperature instructs the AI how much "risk" it should take to complete the sentence. In this particular case it means, the higher the value the more creative answers you get. The value allowed here is from 0 to 2.
To figure out which settings do work best for your use case you have to tinker around a little with the available parameters. As you can see in the documentation, there are more parameters you can pass to tweak the result even further.
3. Get the result
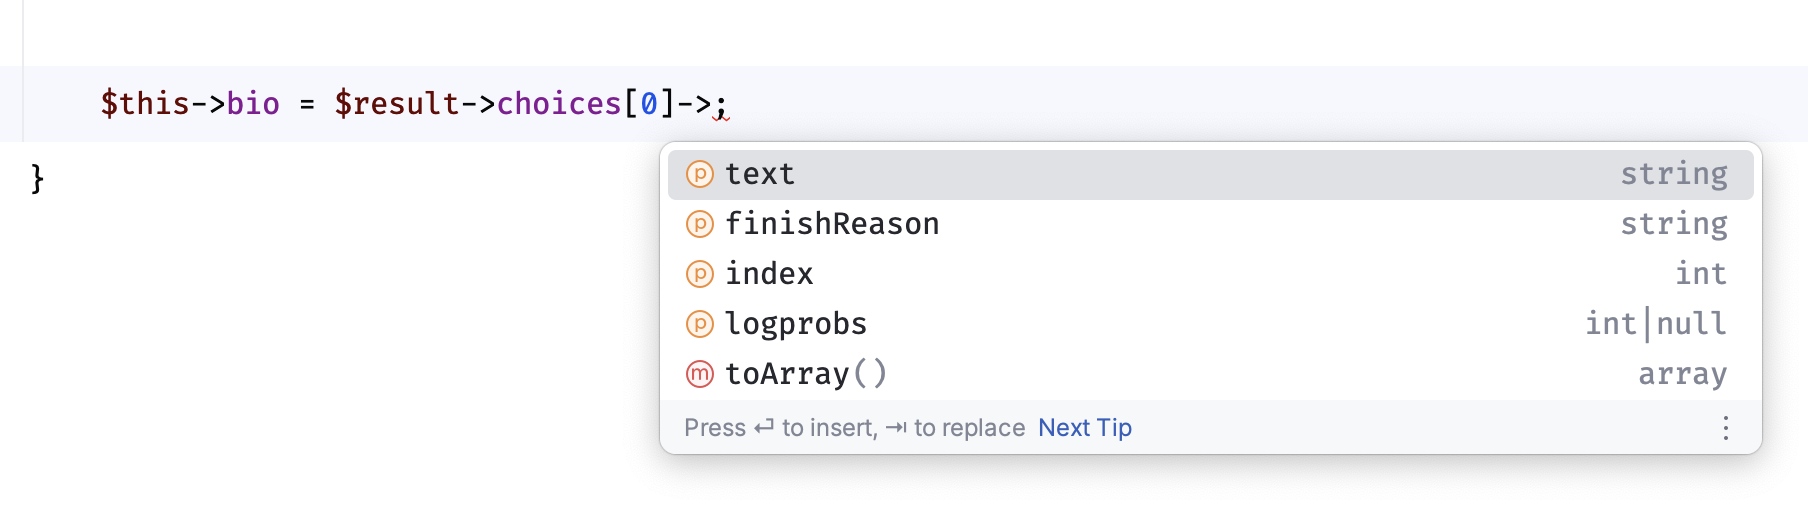
$this->bio = $result->choices[0]->text;
Getting the actual result is really simple. Especially if the IDE helps you as much as PHPStorm does as the library is fully typed 🚀
If you like to get the original response from the API you can call the toArray() method on the response object.
{
  "id": "cmpl-64DvBzVUq2YrNvJWE0gIJRCzUsakd",
  "object": "text_completion",
  "created": 1666464845,
  "model": "text-davinci-002",
  "choices": [
    {
      "text": "\n\nI am a web developer with experience [...]",
      "index": 0,
      "logprobs": null,
      "finish_reason": "stop"
    }
  ],
  "usage": {
    "prompt_tokens": 13,
    "completion_tokens": 38,
    "total_tokens": 51
  }
}
More about the OpenAI PHP Client package
If you want to learn more about the package and how to use it, visit the GitHub repository.